


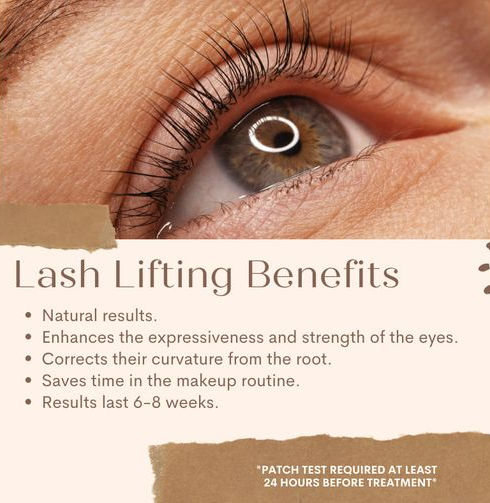
Lash Lift & Tint
2 days class
Introduction
-
What is Lash lifting
-
Structure of the eye
-
Structure of the eyelash
-
Lash lift Products
-
Preparation for the treatment and
client consultation
-
Lash Lifting tutorials
-
After care
-
Hygiene and sanitation
WELCOME TO THE BROW COSMETIC ACADEMY
I just wanted to say thank you so much from the bottom of my heart for wanting to learn The Brow cosmetic lash lift ways.
I've been lifting for over 4 years now and have failed so many times. I want you to know it really is all about education, practice and perseverance! NEVER GIVE UP! I'm here for you and with you on your lifting journey so please don't hesitate to reach out and let me know how you are going with the new techniques you've learnt from me!
1.
Jump right into it and watch The Brow Cosmetic VIDEO! This is a detailed lash lift from start to finish, with me talking you through every single thing I'm doing. Grab a pen and paper and take notes!
2.
Understand the Lashes and shields
1. different types of curl

2. different sizes of curl

3.
Lash Lift Gone Wrong? Why it Happened and How to Fix it
Lash Lift Nightmare #1: No Effect
You run to the mirror after your procedure and see… well, nothing different. Lash lift results are subtle, but your before and after pics shouldn’t look identical.
What Happened?
One of these culprits likely sabotaged your results:
Dirty lashes. Lash lift solutions only work on squeaky clean lashes.
Too much glue was applied to your lashes. The lifting solution won’t be able to do its job if lashes are coated in so much glue they’re gooey!
The lifting solution wasn’t given long enough to work. The solution needs time to reshape your lashes, especially if they’re straight or thick.
Make it Dreamy!
If your lashes are in good condition, you can have another procedure about a day or two after your letdown lift.
Though, for ultimate TLC, give your lashes at least a month to recover before you process them again.
When you have another lash lift, clean all traces of makeup, dirt, and oil off your lashes, don’t overdo the glue, and keep the lifting solution on long enough to raise your specific lash type.
Top Tip: Stop wearing waterproof mascara 48 hours before your lash lift, don’t wear makeup on the day of your procedure, and wash your lashes just before you have your procedure done.
Lash Lift Nightmare #2: Lashes Are Too Curly
Sure, you wanted curled lashes, but this is ridiculous – your lashes are so curled they’ve gone loopy!
What Happened?
Overly curled lashes are usually down to over processing. Either too much lifting solution was applied, or the solution was left on too long.
Make it Dreamy!
If you’ve got resilient lashes still in good condition after their extreme curling, you can have a procedure done to reverse the curl. This procedure does the opposite of a lash lift: instead of sweeping lashes upward, the solution brushes lashes downward to relax the lift.
Further processing damaged lashes will cause more lash drama than you’re already dealing with. Rather give worn-out lashes about 6 weeks to grow out the lash lift on their own.
Apply nourishing oil to your lashes daily to make them healthier and more attractive, whether you have your lash lift reversed or leave it to grow out.
After your lashes are back to full strength, they’re ready for another lash lift – but make sure the right amount of solution is left on for the right amount of time!


Lash Lift Nightmare #3: Results Don’t Last
You’ve heard that lash lifts can last up to 2 months, but it hasn’t even been 2 days, and your results are already falling flat.
What Happened?
Oh dear, your bubble bath might be to blame! If you got water, steam, sweat, or heat (or all three) near your lashes in the 24 hours after your procedure, this is probably why your lash lift didn’t last.
You must also keep makeup and products away from your lashes for a full day post-procedure.
Make it Dreamy!
After your next lash lift, take aftercare seriously for the next 24 hours.
Lash Lift Nightmare #4: Lashes Are Damaged
Lashes with split ends are a thing. And it’s not pretty. Neither are frizzy, unruly lashes.
What Happened?
The lifting solution was left on your lashes too long, or too much solution was used. The solution might also have been applied to your entire lash length. The excess solution or extra time allowed your lashes to be eaten away until they were weakened and vulnerable to breakage.
Make it Dreamy!
The only fix for damaged lashes is time for healing. And gentle care. Condition your lashes daily (or even twice a day) with a nourishing oil like coconut or castor oil. Another option is to apply a good lash growth serum to encourage your lashes to grow while they’re on the mend.
It will take willpower, but you’ll need to stick it out for about 6 weeks before you have another lash lift. That’s how long lashes take to complete their growth cycle. Waiting this time will ensure your next procedure is done on brand new lashes. Don’t make the same mistake twice: when you have another lift, keep your eye on the clock and how much solution goes onto your lashes and where.


other cases not that great works


How to make lash lift perfect

Make sure all lashes are straight up

4.
Procedure
1: Take before photos & videos.
2: Cleanse lashes and rinse.
3: Apply eye pads.
4: Measure lashes against both a rod & shield and pick which best suits your client.
5: Apply rod/shield flush to the base of the lash line. This is to ensure a tight lift from the very base of the hairs.
6: Start lifting the lashes to the rod/shield in sections (I use Elleebana original adhesive and apply with a lip wand). Pull the lashes up from the base of the lash line slowly and firmly. I use a Y tool, and the sharp and blunt separation tools. Please take your time with this step as this is one of the most important parts. Always check that the bottom lashes are not getting lifted onto the rod/shield.
7: While you are attaching the lashes to the rod/shield, make sure you are double checking each eye to ensure the lashes are applied straight and in the same direction on both eyes.
8: Apply solution 1 starting from the outer corners to the inner corners, please see video for how I apply. Leave for the appropriate processing time (for this client I left it on for 7 minutes) different hair might need different timings.
9: Remove solution 1 with a wet cotton tip from the inner corners 1 minute before the total processing time. Then go over the area with a dry cotton tip. I do this as the inner corner hairs are often finer and thinner than the other hairs on the eye.
10: Remove the remaining solution from inner to outer with a wet cotton tip and then go over it with a dry cotton tip.
11: Repeat the same for solution 2.
12: Repeat the same removal process.
13: Wipe over with a wet cotton pad making sure all solution 2 is completely removed. This is very important to ensure you do not over process the hairs.
(14: Apply Elleeplex Regen and leave for 3 - 5 minutes.) Option ;
(15: Remove Regen with a wet cotton pad, rinse lashes fully and remove rods/shields revealing your lift!) Option ;
16: Flick out the bottom lashes from underneath the eye pad using the blunt lifting tool. Here is where you can use a barrier cream to ensure you do not get any tint stain on the skin, however with experience this is not necessary.
17: Apply black tint using a tint brush and tint shield. Leave for 3-5 minutes.
18: Flush the eyes removing the tint making sure there is no tint residue left.
19: Fan dry the lashes brushing with a mascara wand in a upwards motion.
20: Apply Elleeplex Aftercare serum.
21: Show clients and take AFTER photos.
5.
Lash Lift FAQ for Clients
WHAT IS A LASH LIFT?
It’s a lifting technique designed to give you longer-looking lashes without the need for lash extensions. It will look as if you used a good eyelash curler, only this lift lasts for 6 to 8 weeks! To top off the treatment, I’ll apply a black lash tint which really makes your lashes look more prominent. The procedure takes about 45 to 60 mins to complete. It really is an easy way to instantly brighten and open up the eye area!
HOW DO I NEED TO PREP FOR THE TREATMENT?
Please Arrive to Your Appointment Completely Free of Eye Make Up! Also, you must stop usage of waterproof mascara at least 2 days prior to your Lift! If you wear contacts, they must be removed.
IS THIS LIKE LASH EXTENSION WHERE THEY WILL LOOK DRAMATICALLY THICKER?
Lash extensions and lash lifts are 2 totally different animals. I will not be adding any additional lashes to you. I will simply be curling your natural lashes. That said, for most, it can make your lashes appear fuller because they are so uplifted.
WHAT ARE THE POST TREATMENT INSTRUCTIONS?
Pretty simple: Don’t get your lashes wet or apply anything at all to them for 24 hours. Steer clear of waterproof mascara the entire life of your Lift. Brush out the lashes daily.
IS THERE ANY MAINTENANCE?
None! You don’t have to do anything special with your lashes in between lifts other than giving them a good brush out daily and stay away from waterproof mascara.
CAN I STILL WEAR MASCARA?
Of course! You’ll just achieve a more dramatic effect when mascara is applied to your curled lashes.
WHY CAN’T I WEAR WATERPROOF MASCARA?
Harsh chemicals are used in waterproof formulas in order to make them, well…. waterproof. This chemical composition is extremely drying to your lashes. Not to mention all the effort and extra tugging and pulling on the lashes to remove the mascara. To be honest, most people are not great at thoroughly removing the mascara. If that’s the case, now you’re running around with this super drying film of chemicals on your lashes 24 hours a day. This results in weakened lashes that are prone to breakage, and over shedding.
WHY DO I HAVE TO STOP WEARING WATERPROOF MASCARA 2 DAYS BEFORE?
Pretty much for all the reasons I just stated above. If you are a regular waterproof mascara wearer, then you are already walking in my door with dehydrated and weakened lashes, which will result in a poor Lift and possible further damage.
WILL THIS DAMAGE MY EYELASHES?
No, if you follow all the advice on Pre-prep and Post care. The lifting solutions are only applied to the new growth area of the lashes, down towards the base and up a bit. Never to the ends of the lashes.
ARE SOME LASHES RESISTANT TO THE CURL?
I have found, on occasion, that it’s very difficult and sometimes not possible to sustain the curl with lashes that have a strong cowlick or slanted growth pattern. Also, growth patterns due to plastic surgery in the eye area are often not able to be corrected. I say, give the treatment a shot once, and let’s see how your lashes hold the curl.
IS IT PAINFUL?
No. At first, when I’m applying the shields to the eyelids, it may feel a bit strange. But, for the most part, it’s very relaxing! You just kick back and relax
I HAVE DOWNWARD-POINTING LASHES, WILL THIS BE A GOOD TREATMENT FOR ME?
Heck yes! Anyone with these types of pesky lashes will love the lash lift! Post treatment, your lashes will all be evenly dispersed and lifted.
HOW LONG DOES THE EFFECT LAST?
Depending on the length and quality of your natural lashes, the lift can last for 6 to 8 weeks.
I HAVE VERY SHORT LASHES. AM I ABLE TO STILL DO THIS PROCEDURE?
Most of the time, yes. Though it can be challenging if the lashes aren’t even long enough to bring up and back on to the shield. But I say, give it a shot once and see how you do!
Bonus information on Rods & Shields
THIS QUESTION I find gets asked time and time again and can dramatically have an impact on your end results for lash lifts.
Question:
If a client is measuring between rod/ shield sizes, what do you do? Do you recommend going up or down in size?
What you need to do first is ask yourself and your client what result they are wanting to achieve at the end. A more relaxed natural lifted look or a more dramatic EXTRA lift and curl. A smaller size will give a more dramatic lift and curl as opposed to a larger size will give a softer lift and curl.
Solution placement is such an important key!! Should we apply that solution to just half way to give just a lift and less of a curl, or should we want to extend that solution as far as we can and create a more dramatic result by bringing the solutions up 3/4? Maybe less solution on the inners? If they have longer inner corners put a tiny amount at the base of the hairs so that they don't curl back too much.
What sort of eye shape do they have? A deep set eye or hooded eye if choosing a smaller size can flip back the lashes and rub inadvertently onto the eye area and become quite annoying so a larger size is more suitable here.
So basically you can use either size if they are measuring in between both taking into consideration what is mentioned above.
As you may have notice, I have CUT THE INNER CORNERS of the shield. I don't do this often but with my model as you can see the tips of her lashes naturally curl slightly. So cutting the shield back helps prevent the lashes from flipping back on themselves. Because the inner corner of a shield can be quite flat. This HACK is amazing for those client with long inner corner lashes or curled tips. ️
6.
after care ( All my student can copy and use this after care)
Keep your lashes dry and avoid sleeping on your face for the first 24 hours. Eye makeup and mascara can be worn after the first 24 hours.
Avoid touching, picking or pulling at your lashes.Remove all eye makeup with a gentle cleanser.Brush your lashes with a spoolie-brush daily.
This procedure is a chemical process that may dry out your lashes so it’s important to apply your complementary conditioning serum daily, or 3-4 times a week to condition and moisturize your lashes.
Lash lifts can last anywhere from 5-8 weeks and will gradually start to relax and fall as your new lashes begin to grow in. Around this time, your lashes may start to appear tangled or crinkled but don’t fear! It’s not damage, your new growth are just coming in!
You can book a refresher lift when you’re in between lifts or schedule them every 7-8 weeks for optimal results.

Let's Get
Social


